

장바구니에 상품이 없습니다..
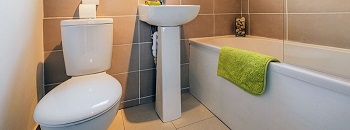
욕실 리모델링에 많은 시간과 노력을 투자했다면, 당신은 의심할 여지없이 욕조 아래의 보기 흉한 공간을 덮을 수 있는 적절한 장식용 욕조 패널을 고려했을 것입니다.. 누구도 패널을 제자리에 고정하는 못생긴 나사 머리를 보고 싶어하지 않습니다., 그리고 더 중요한 것은, if your tub springs a leak it will take vital time to remove the panel. The smart solution is a magnetic bath panel which is straightforward to remove allowing easy access to your vital plumbing. What’s more magnets are more robust and less fiddly than plastic bath clips.
Go straight to the magnets, or read on to see how one of our customers installed their bath panel. Here’s how Jonny from South Lanarkshire installed his own magnetic bath panel:1) 첫째로, 욕조 주변에 목재 프레임이 설치되었습니다.. 프레임은 욕조 가장자리 사이에 단단히 고정되어야 합니다., 벽과 바닥. 프레임을 설치할 때, 패널의 두께를 고려하고 프레임을 욕조 가장자리에서 약간 뒤쪽에 놓는 것이 중요하므로 설치 시, 패널은 욕조 가장자리와 같은 높이에 놓입니다.. 2) 프레임을 제자리에 놓은 후, 조니가 붙어있다 접시머리 강철 디스크 프레임과 동일한 거리에 스테인리스 스틸 나사 사용. 이 강철 디스크는 자석이 끌어당기는 스트라이커 플레이트 역할을 합니다.. 3) 다음, 플랫 헤드 드릴 비트를 사용하여 동일한 거리에서 MDF 욕조 패널에 평평한 바닥 구멍을 뚫었습니다., 나무 프레임의 강철 디스크에 해당. 4) 카운터보어 네오디뮴 냄비 자석 그런 다음 구멍에 장착하고 스테인레스 스틸 나사를 사용하여 제자리에 고정하여 플러시 자기 표면을 만듭니다.. 이 자석에는 자석의 조임력을 증가시키는 스테인리스 스틸 쉘이 있습니다., 부식으로부터 보호하는 동시에. Jonny가 사용하는 자석은 직경 14mm x 두께 3.6mm이며 각각 당기는 힘은 5.2kg입니다., 따라서 프레임의 각 지지 빔에 있는 해당 강철 디스크에 끌리도록 배치된 2개 또는 3개의 자석이 적절한 고정력을 제공합니다., 제거하기 너무 어렵지 않으면서. 물론, 사용하는 재료와 장착하는 패널 유형에 따라 동일한 효과를 얻을 수 있는 다른 방법이 있습니다.. 예를 들어, 플라스틱 패널을 장착하는 경우, 자석을 리베이트할 수 없다는 것, it would be easier to fit the magnets to the timber frame, and then usestrong adhesive to secure the steel discs on to the panel.In this example, 16mm diameter steel discs were used, however if you have the space it is useful to use steel discs with a larger diameter than the magnets you are using, this means you don’t have to be quite as accurate with your positioning of the steel discs and magnets and if you need to slide the panel up or down, or side to side to make your panel fit perfectly you can do so without the magnets and discs being misaligned. For example a sensible option would be to use 32mm diameter ferrite pot magnets, with 50mm diameter steel discs.Once the discs and magnets are in place, it is easy to position your bath panel as the magnets will locate the discs providing a secure hold. Before placing the panel in position, it is important to consider how you will remove it – you will need to leave a slight gap around one edge so that you will be able leverage the panel away from the frame, otherwise all your hard work will be in vain!Thanks again go to Jonny from South Lanarkshire who sent us these photographs taken during installation of his own panel. If you would like to replicate Jonny’s project, then you will need the following:
Go straight to the magnets, or read on to see how one of our customers installed their bath panel. Here’s how Jonny from South Lanarkshire installed his own magnetic bath panel:1) 첫째로, 욕조 주변에 목재 프레임이 설치되었습니다.. 프레임은 욕조 가장자리 사이에 단단히 고정되어야 합니다., 벽과 바닥. 프레임을 설치할 때, 패널의 두께를 고려하고 프레임을 욕조 가장자리에서 약간 뒤쪽에 놓는 것이 중요하므로 설치 시, 패널은 욕조 가장자리와 같은 높이에 놓입니다.. 2) 프레임을 제자리에 놓은 후, 조니가 붙어있다 접시머리 강철 디스크 프레임과 동일한 거리에 스테인리스 스틸 나사 사용. 이 강철 디스크는 자석이 끌어당기는 스트라이커 플레이트 역할을 합니다.. 3) 다음, 플랫 헤드 드릴 비트를 사용하여 동일한 거리에서 MDF 욕조 패널에 평평한 바닥 구멍을 뚫었습니다., 나무 프레임의 강철 디스크에 해당. 4) 카운터보어 네오디뮴 냄비 자석 그런 다음 구멍에 장착하고 스테인레스 스틸 나사를 사용하여 제자리에 고정하여 플러시 자기 표면을 만듭니다.. 이 자석에는 자석의 조임력을 증가시키는 스테인리스 스틸 쉘이 있습니다., 부식으로부터 보호하는 동시에. Jonny가 사용하는 자석은 직경 14mm x 두께 3.6mm이며 각각 당기는 힘은 5.2kg입니다., 따라서 프레임의 각 지지 빔에 있는 해당 강철 디스크에 끌리도록 배치된 2개 또는 3개의 자석이 적절한 고정력을 제공합니다., 제거하기 너무 어렵지 않으면서. 물론, 사용하는 재료와 장착하는 패널 유형에 따라 동일한 효과를 얻을 수 있는 다른 방법이 있습니다.. 예를 들어, 플라스틱 패널을 장착하는 경우, 자석을 리베이트할 수 없다는 것, it would be easier to fit the magnets to the timber frame, and then usestrong adhesive to secure the steel discs on to the panel.In this example, 16mm diameter steel discs were used, however if you have the space it is useful to use steel discs with a larger diameter than the magnets you are using, this means you don’t have to be quite as accurate with your positioning of the steel discs and magnets and if you need to slide the panel up or down, or side to side to make your panel fit perfectly you can do so without the magnets and discs being misaligned. For example a sensible option would be to use 32mm diameter ferrite pot magnets, with 50mm diameter steel discs.Once the discs and magnets are in place, it is easy to position your bath panel as the magnets will locate the discs providing a secure hold. Before placing the panel in position, it is important to consider how you will remove it – you will need to leave a slight gap around one edge so that you will be able leverage the panel away from the frame, otherwise all your hard work will be in vain!Thanks again go to Jonny from South Lanarkshire who sent us these photographs taken during installation of his own panel. If you would like to replicate Jonny’s project, then you will need the following:
